Teie veebibrauser on aegunud ning ei toeta kõiki funktsioone.
Värksendage enda brauserit või laadige alla Chrome brauser siit

iOS app
Android app
To open the 3D model within a project, select the 3D icon from the command bar. Upon opening the model, you can choose which part models you wish to display at the same time. Some models can be quite heavy sizewise and your phone might have trouble loading them all at once. Choosing only necessary part models is of help in these cases.
Footer Menu
Reset – reloads the model to its initial state.
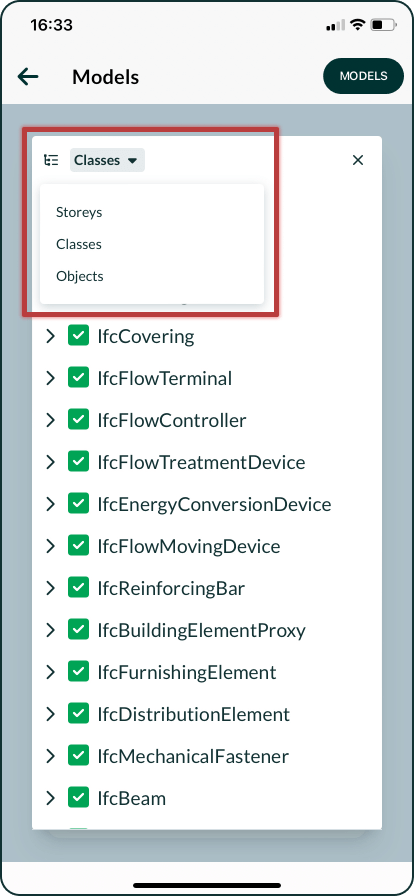
Structure – opens a panel describing the model's structure. The model's structure can be viewed in four ways:
Hide – hides the object when pressed on it. Hidden objects can be made visible again by deselecting the option on the command bar and choosing “Show All” from the dropdown menu that appears when pressing on the screen.
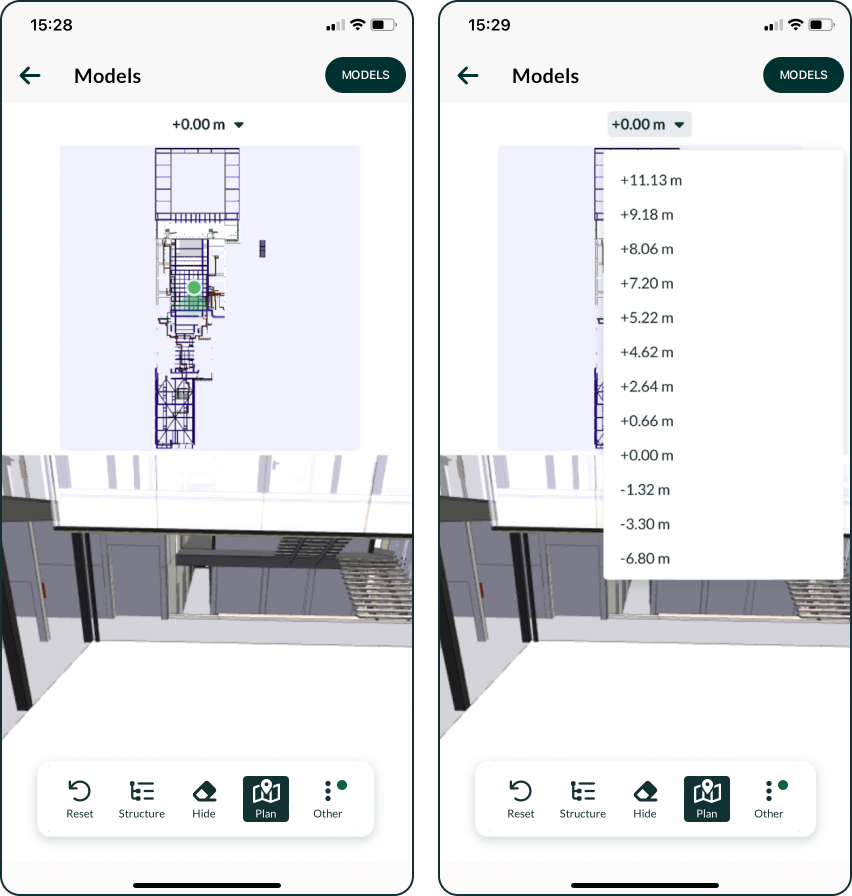
Floor Plan – opens the floor plan window. Tapping on the floor plan navigates the model view to the corresponding location. Floor selection in the floor plan is done using elevation marks.

Footer Menu

Reset – reloads the model to its initial state.
Structure – opens a panel describing the model's structure. The model's structure can be viewed in four ways:
- Floors – displays a list of elevation marks that represent floors.
- Classes – displays a list of IFC standard classes and the objects within those classes.
- Objects – displays a list of objects in the model, grouped by part models.
Hide – hides the object when pressed on it. Hidden objects can be made visible again by deselecting the option on the command bar and choosing “Show All” from the dropdown menu that appears when pressing on the screen.
Floor Plan – opens the floor plan window. Tapping on the floor plan navigates the model view to the corresponding location. Floor selection in the floor plan is done using elevation marks.
Options available under the footer menu ellipsis:
2D – view the model in two-dimensional plan view.
Orthographic View – activates the view with orthographic perspective. Orthographic view maintains all dimensions proportionally, regardless of their distance from the observer.
Orthographic View – activates the view with orthographic perspective. Orthographic view maintains all dimensions proportionally, regardless of their distance from the observer.
Focus on Object – focuses the view on the activated object, or if no object is activated, then on the entire model.
First Person View – activates a view where the view rotates around the camera's location. This is opposite to the standard view, where the camera rotates around the focus point location.
Dropdown menu upon pressing on an object
First Person View – activates a view where the view rotates around the camera's location. This is opposite to the standard view, where the camera rotates around the focus point location.
Dropdown menu upon pressing on an object

Info – opens a panel on the screen with information about the object.
Focus on Object – focuses the view on the activated object, or if no object is activated, then on the entire model.
Create Slice – allows making a cross-section of the model.
Hide – hides the object. Hidden objects can be made visible again by tapping on screen and selecting “Show All” from the dropdown menu.
Hide Others – hides everything except for this object.
Isolate Class – displays objects in the same class as the object in isolation, i.e., everything else is hidden.
Hide Class – hides the object along with all other objects of the same class.
Show All – makes all hidden objects visible.
Deselect Options – deactivates all objects that have been activated.
- Buttons next to the object class can display objects in the same class in isolation (i.e., everything else is hidden) or, conversely, hide all objects of the same class.
- Object parameters can also be marked as favorites by clicking on the bookmark icon, resulting in them being displayed at the beginning of the list.

Focus on Object – focuses the view on the activated object, or if no object is activated, then on the entire model.
Create Slice – allows making a cross-section of the model.
- Click on a wall, roof, or other object along whose axis you wish to make a cut and and lick “Create slice” from the dropdown.
- Then, a panel appears on the right edge of the screen, which you can drag with your finger to change the depth of the cut.
- More than one section can be made.
- Active sections can be managed from the scissors icon on the screen, where they can be removed or modified.
- To remove all sections, click on the scissors icon and “Clear All” from the dropdown menu.

Hide – hides the object. Hidden objects can be made visible again by tapping on screen and selecting “Show All” from the dropdown menu.
Hide Others – hides everything except for this object.
Isolate Class – displays objects in the same class as the object in isolation, i.e., everything else is hidden.
Hide Class – hides the object along with all other objects of the same class.
Show All – makes all hidden objects visible.
Deselect Options – deactivates all objects that have been activated.